How to disassemble Acer Aspire Laptops
In my case I’m taking apart an Acer Aspire 5742-6682 model.
Also, this guide will work for Acer Aspire 5742z laptops.
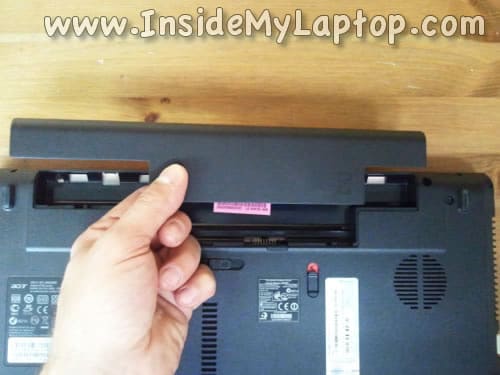
Make sure the laptop is turned off before you start the disassembly process.
STEP 1.
Unlock and remove the laptop battery.
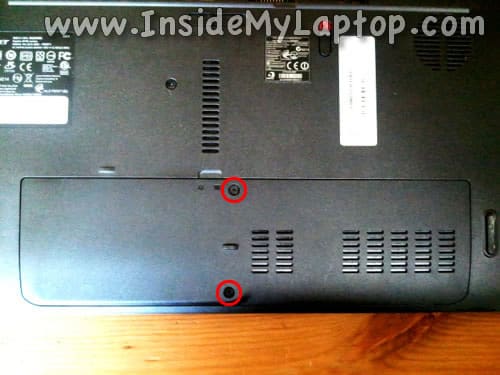
STEP 2.
Remove two screws securing the hard drive/memory cover on the bottom of the laptop.
Lift up and remove the cover.
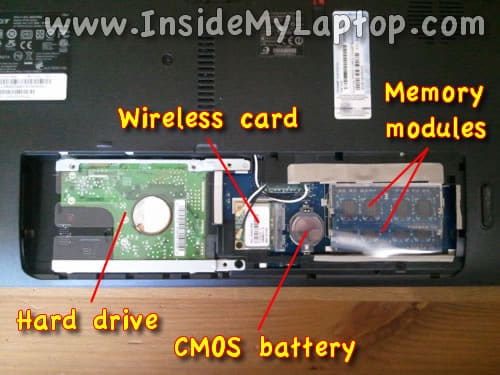
Under the cover you’ll get access to the following laptop components:
- Hard drive.
- Wireless card.
- CMOS battery.
- Both memory modules.
STEP 3.
The hard drive assembly secured by one screw located in the lower right part of the mounting bracket.
Remove one screw securing the hard drive.
Slide the hard drive assembly to the right to disconnect it from the motherboard.

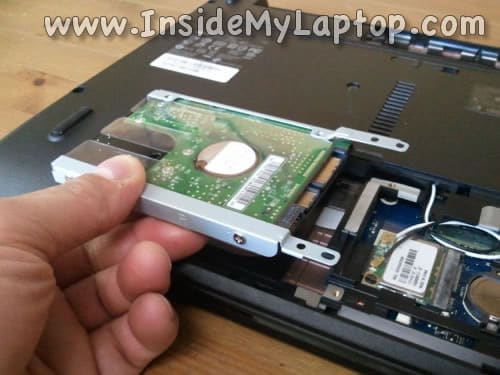
STEP 4.
Lift up and remove the hard drive assembly from the laptop.
Acer Aspire 5742 series laptop comes with a regular 2.5″ SATA hard drive. This hard drive can be replaced with any other large capacity 2.5″ SATA HDD or 2.5″ SSD.
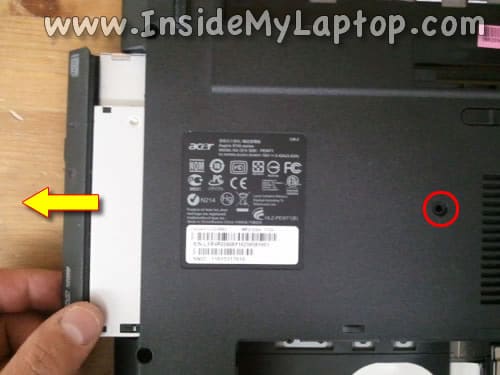
STEP 5.
Remove one screw securing the optical drive.
Pull the optical drive to the right and remove it from the laptop.
STEP 6.
NOTE: in order to remove and replace the keyboard it is not necessary to go through the previous disassembly steps. Just follow instructions in steps 6-11.
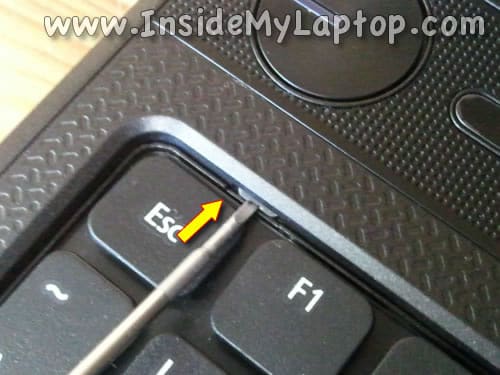
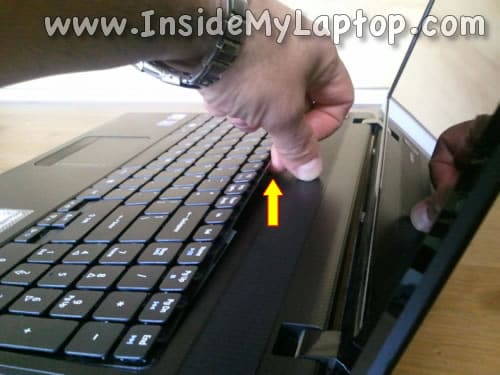
The keyboard secured to the laptop case by six spring loaded latches.
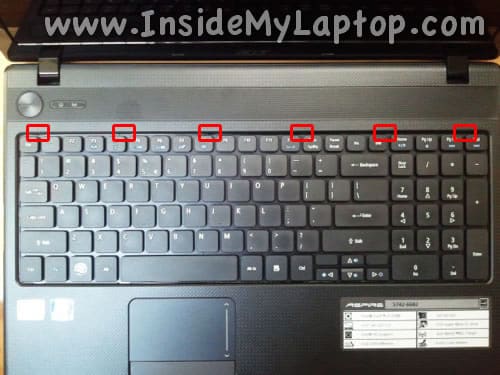
In order to remove the keyboard it’s necessary to push on each latch with a small screwdriver and at the same time lift up the keyboard a little bit so the latch doesn’t lock back in place.
STEP 7.
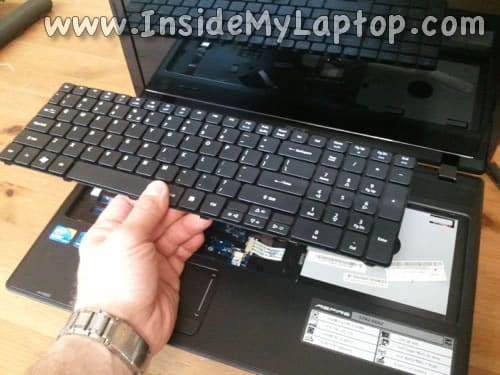
After all latches unlocked you can insert your fingers under the keyboard (close to LCD screen) and start removing the keyboard.
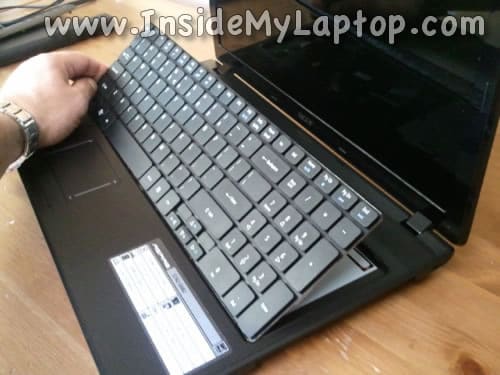
STEP 8.
Continue removing the keyboard and place it upside down on the palmrest.
Be careful. The keyboard still connected to the motherboard.
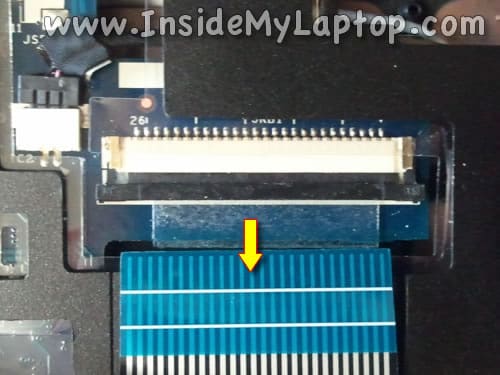
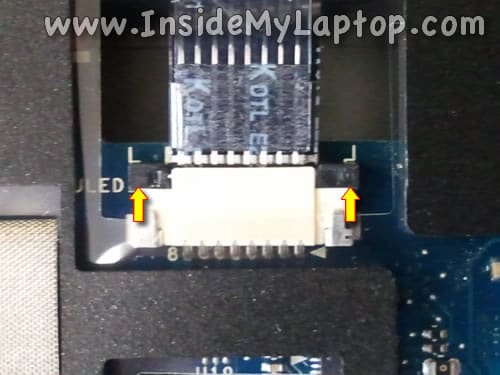
The keyboard cable connector located under the keyboard.
Before you remove the keyboard it’s necessary to unlock the connector and release the cable.
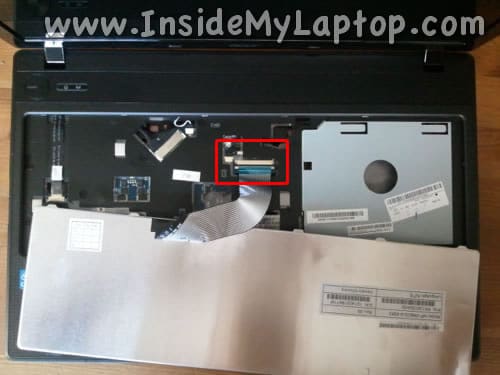
In the following two steps I explain how to unlock the keyboard connector.
STEP 9.
Very carefully move the retaining tab about 2 millimeters to the shown direction.
The retaining tab must remain connected to the connector base.
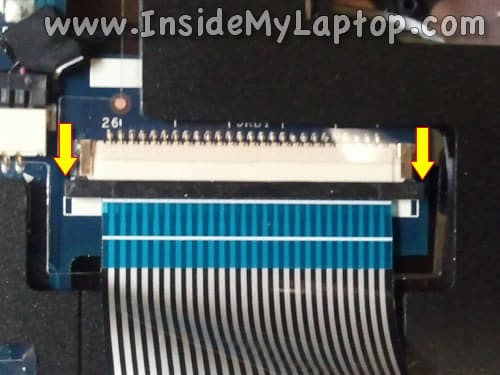
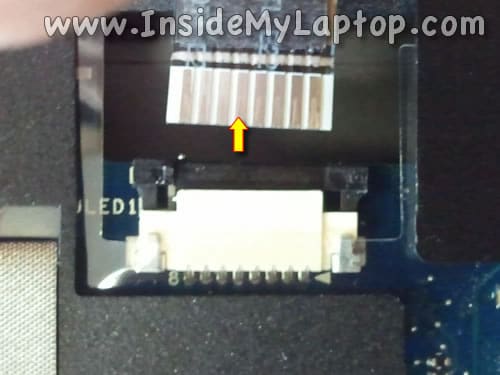
STEP 10.
On this picture the connector shown in the UNLOCKED position.
Now you can pull the keyboard cable from the connector.
STEP 11.
Remove the keyboard.
If you need to change the keyboard you can find a new replacement keyboard for Acer Aspire 5742 laptop here.
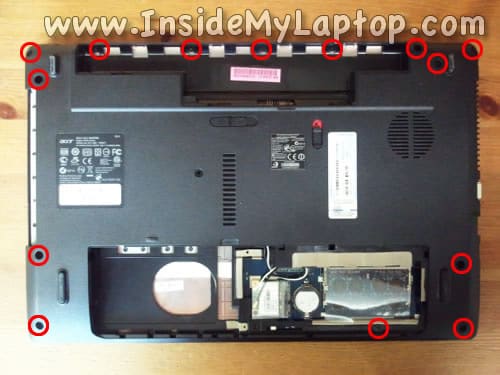
STEP 12.
Remove all screws from the bottom of the laptop.
STEP 13.
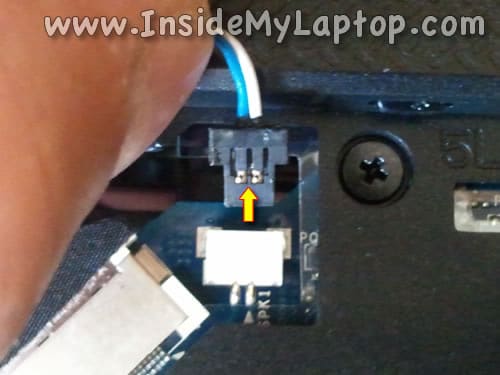
Disconnect three cables from the motherboard (left to right):
- Power button board cable.
- Speaker cable.
- Touchpad cable.
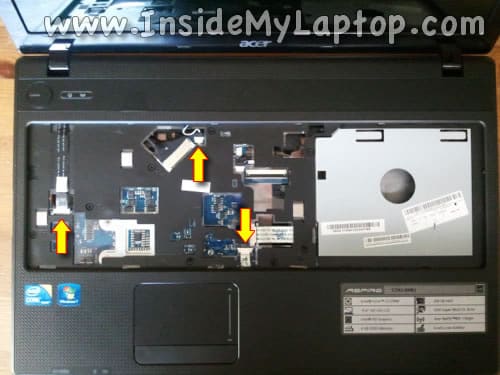
Disconnect the power button board cable and touchpad cable same way you disconnected the keyboard cable.
Unlock the connector by moving the retainer about 2 millimeters to the shown direction.
Pull cable from the connector.
Here’s how to disconnect the speaker cable.
Simply unplug it form the motherboard.
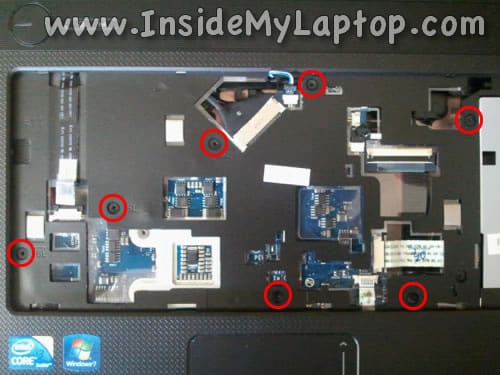
STEP 14.
Remove screws securing the top cover (palmrest) assembly.
STEP 15.
Start separating the top cover assembly from the bottom cover.
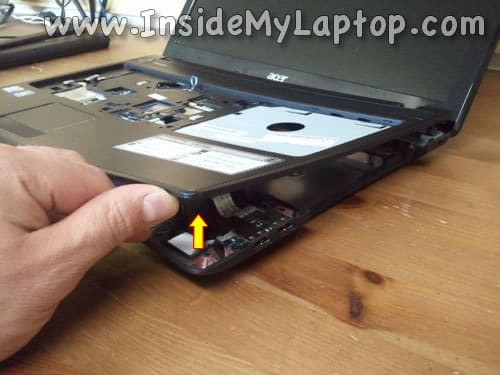
STEP 16.
Remove the top cover assembly from the laptop.

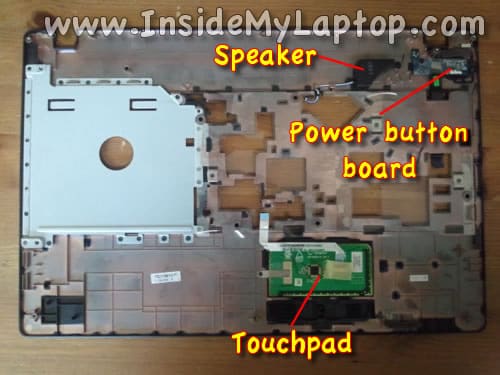
On the bottom side of the top cover assembly you can access the following laptop components:
- Speaker. I was very surprised to find out that Acer Aspire 5742 has only ONE speaker installed.
- Power button board.
- Touchpad.
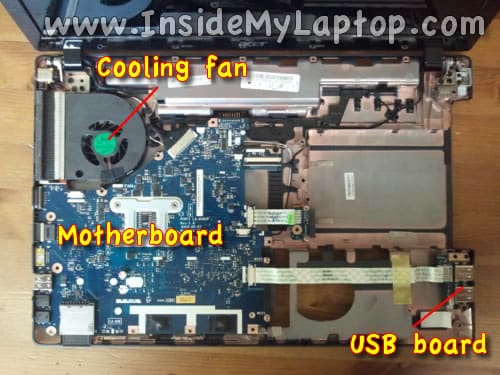
After you remove the top cover assembly you’ll get access to the laptop motherboard, USB board, cooling fan, DC jack and other internal components.
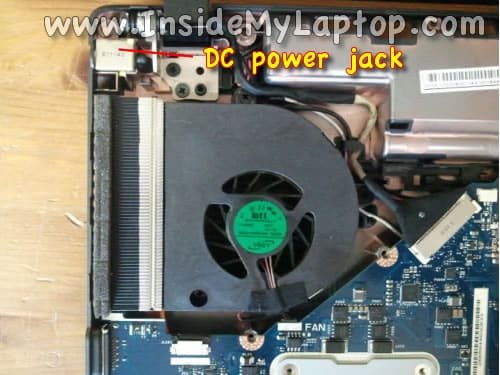
Acer Aspire 5742 series laptop has a DC power jack harness which can be replaced without soldering if the jack fails.
The cooling fan also can be easily accessed and replaced or cleaned after you remove the top cover assembly.
If you need a new replacement cooling fan, you can find it here.
No comments:
Post a Comment